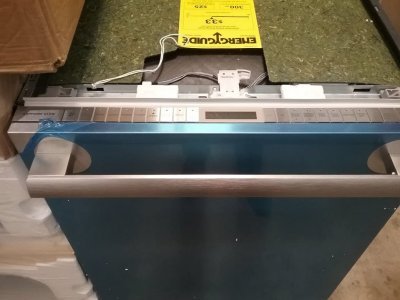
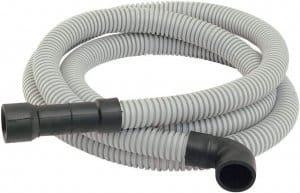
A dishwasher is an essential kitchen appliance that makes cleaning dishes a breeze. However, when it comes to installation, many people struggle with properly installing the dishwasher drain hose. The dishwasher drain hose is a critical component that helps remove wastewater from the dishwasher. In this article, we will walk you through the steps of installing a dishwasher drain hose.
Tools and Materials: Before you begin the installation process, it’s essential to gather all the necessary tools and materials. Here’s what you’ll need:
- Dishwasher drain hose kit
- Screwdriver
- Pliers
- Hose clamp
- Dishwasher installation manual
- Teflon tape
Step 1: Shut off the Power and Water Supply Before you begin any installation work, ensure that the power and water supply are switched off. This will prevent any accidents from happening and ensure your safety during the installation process.
Step 2: Unpack the Dishwasher Unpack the dishwasher and remove all the packaging material. Ensure that you have all the necessary parts and accessories before you begin the installation process.
Step 3: Locate the Drain Hose Outlet The next step is to locate the drain hose outlet on the dishwasher. This is usually located at the back of the dishwasher, near the bottom. Check the installation manual if you’re unsure of where the drain hose outlet is located.
Step 4: Install the Drain Hose Attach the drain hose to the drain hose outlet on the dishwasher. Make sure that the hose is tightly secured to prevent any leaks. Use a hose clamp to secure the hose in place.

Step 5: Route the Drain Hose The next step is to route the drain hose to the sink or garbage disposal. Make sure that the hose is not kinked or bent, as this can cause blockages and prevent the dishwasher from draining correctly. Use zip ties or clamps to secure the hose in place.
Step 6: Connect the Drain Hose to the Sink or Garbage Disposal Connect the drain hose to the sink or garbage disposal. If you’re connecting the hose to the sink, remove the sink drain cover and attach the hose to the disposal inlet. If you’re connecting the hose to the garbage disposal, remove the disposal inlet cover and attach the hose to the inlet.
Step 7: Secure the Drain Hose Use a hose clamp to secure the drain hose to the sink or garbage disposal. Make sure that the hose is tightly secured to prevent any leaks.
Step 8: Test the Dishwasher After you’ve installed the drain hose, it’s time to test the dishwasher. Turn on the water supply and power and run the dishwasher through a cycle. Check for any leaks or blockages and make sure that the dishwasher drains correctly.
Step 9: Clean the Dishwasher Once you’ve tested the dishwasher and confirmed that it’s working correctly, clean the dishwasher thoroughly. This will ensure that there are no contaminants or debris left in the dishwasher, which can cause future problems.
Table of Contents
How to Install a Dishwasher Drain Hose?
Installing a dishwasher drain hose is a relatively simple process. First, you’ll need to locate the drain connection on the dishwasher. This is usually located near the bottom of the unit and will be clearly marked.
Once you’ve identified it, attach one end of the drain hose to the connection. Make sure that it’s securely attached and that there are no gaps or leaks in the seal.
Next, you’ll need to connect the other end of the hose to your kitchen sink’s garbage disposal unit or air gap. If your sink has an air gap, simply connect one end of the hose to it and secure it with a clamp. If your sink does not have an air gap, then you’ll need to purchase an adapter kit in order to make this connection.
Finally, run some water through both ends of the hose to check for any leaks before turning on your dishwasher for use.
How to Make Dishwasher Drain Hose Connections?
Making dishwasher drain hose connections is a fairly straightforward process. The most important thing to remember is to make sure the connections are tight and secure.
First, you’ll need to locate the dishwasher drain hose. This is typically located under the sink or behind the dishwasher itself. Once you have located it, you can begin connecting it to the disposal unit or garbage disposal. You will need to use a clamp or other device to hold the connection in place. Make sure that the clamp is tightened securely so that there are no leaks.
Once the connection has been made, you’ll want to test it for leaks by running water through it for a few minutes. If there are any leaks, be sure to tighten the connections further before running your dishwasher again. With these simple steps, you should be able to make your dishwasher drain hose connections with ease!
How to Replace a Smelly Dishwasher Drain Hose?
Replacing a smelly dishwasher drain hose is relatively easy. The first step is to disconnect the old hose from the dishwasher. This can be done by removing the clamps that secure it in place. Once the old hose has been removed, you should clean the area around where it was connected to remove any food particles or debris that may have accumulated over time.
Next, attach the new drain hose to the dishwasher. Make sure to use clamps that are tight enough to keep it in place but not so tight that they damage the hose. After connecting the new hose, run a cycle with hot water and white vinegar to help eliminate any odors that may still remain.
Finally, test out your new dishwasher drain hose by running another cycle with detergent and hot water. If everything works properly, you should now have a fresh smelling dishwasher!
Conclusion:
Installing a dishwasher drain hose may seem intimidating, but it’s a relatively simple process that anyone can do. Follow these nine steps, and you’ll have your dishwasher up and running in no time. Remember to take all necessary precautions, gather all the necessary tools and materials, and refer to the dishwasher installation manual if you’re unsure about any step. With a little patience and attention to detail, you’ll have a fully functional dishwasher that makes cleaning dishes a breeze.

